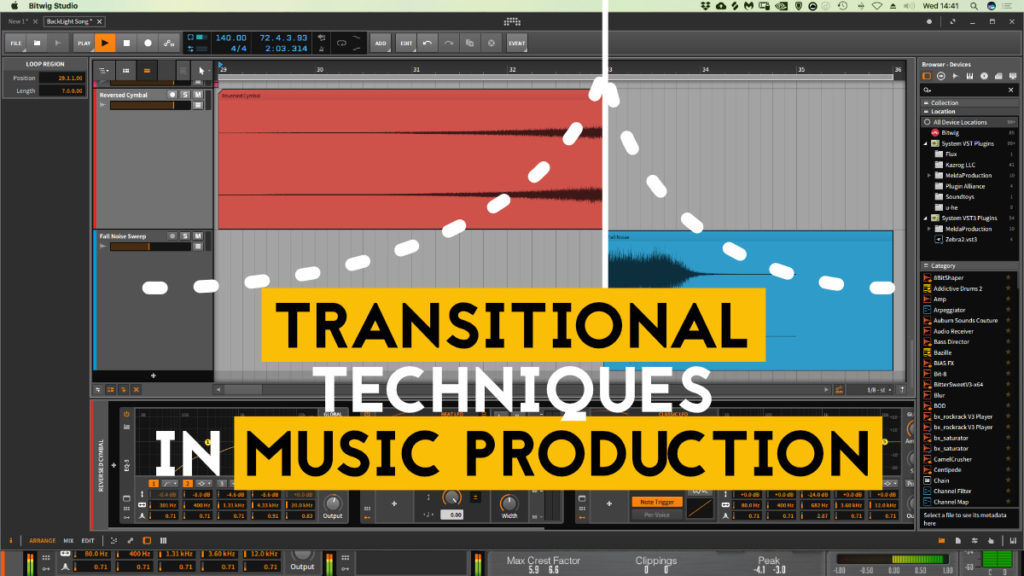
Are there any magical shortcuts to create a great track? Probably not, but there are tricks to turn a decent track into a brilliant track! Adding transitional effects and fills between your different sections can really bring the piece together. Importantly, creating a growing anticipation for what is coming up next.
My 5 best transition techniques
How can we create an awesome transition into that epic chorus drop? These are my top 5 transition techniques in music production!
The small details and spice of a track – transitions and fills, will bring your music to another level.
Your arrangement will flow more natural if you have transitions and varying fills when you introduce new elements in the song. When you move from the chorus back to the verse we need an extra element to glue the parts. Those parts might have a completely different instrumentation and therefore need some sparkle on top. Smoothly leading one part into the next.
Transition techniques in music production – from the 50s into the future.
In the early pop & rock era, commercial music was generally created with a rock band setup (drums, bass, guitar, keyboard and vocals). The transitions often came in the form of a drum fill. That good old drum fill is still used in today’s electronic music but in an ever-evolving creative way.
Today transitions come in all shapes, sizes and forms and everything goes as long as it “works”.
Importantly we want a natural and smooth transition. Sometimes you might want to go with an abrupt switch without any extra sparkle, but today we are talking transitions to guide the listener from one part into another.
You want the listener to feel as much anticipation and euphoria as possible for that climax.
Maybe you are making a build from the verse going into the chorus drop and want to make an interesting smooth transition.
There are many different ways to create interesting transitions. In this article, I compiled a batch of tips and tricks you can use to enhance your own tracks.
Let’s take the music to another level. Time to level up those transitions!
Top 5 Transition Techniques in music production!
First out we have a favourite of mine. And that is to take a vocal sample and pitch it ever so slowly upwards. The vocal riser transition effect!
1. The Vocal Riser Transition Effect
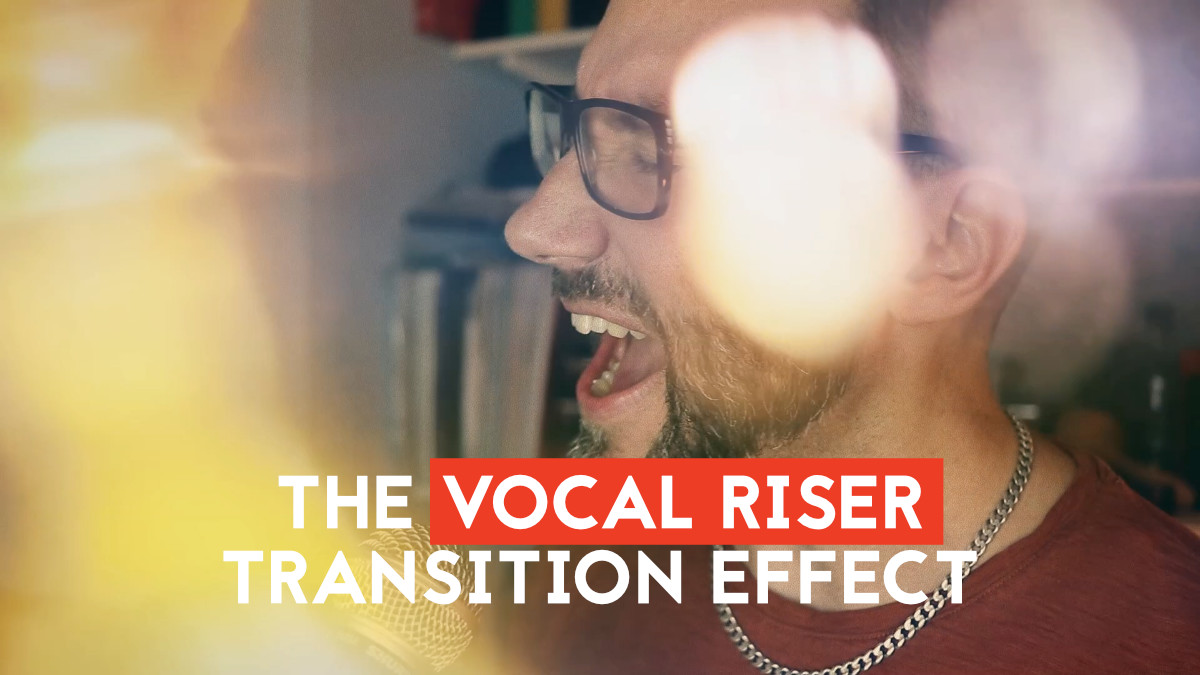
A riser is a sound that is gradually increasing in volume, pitch or another modulation parameter. I usually add these to slowly grow the anticipation and lead right into the drop (chorus).
But most often I add these vocal risers before the drop. It’s not uncommon that this vocal riser is increasing both in volume AND in pitch at the same time. I think this is more unique and interesting than an instrument riser since the sound of a voice is often very rich and familiar to our ears.

We could argue all day about what transition effects are overused and those who are not. But that’s not the point of this article. We just want to learn all the juicy possibilities of how to create different transition effects. Then we can use them in whatever way we like, and create new unique effects.
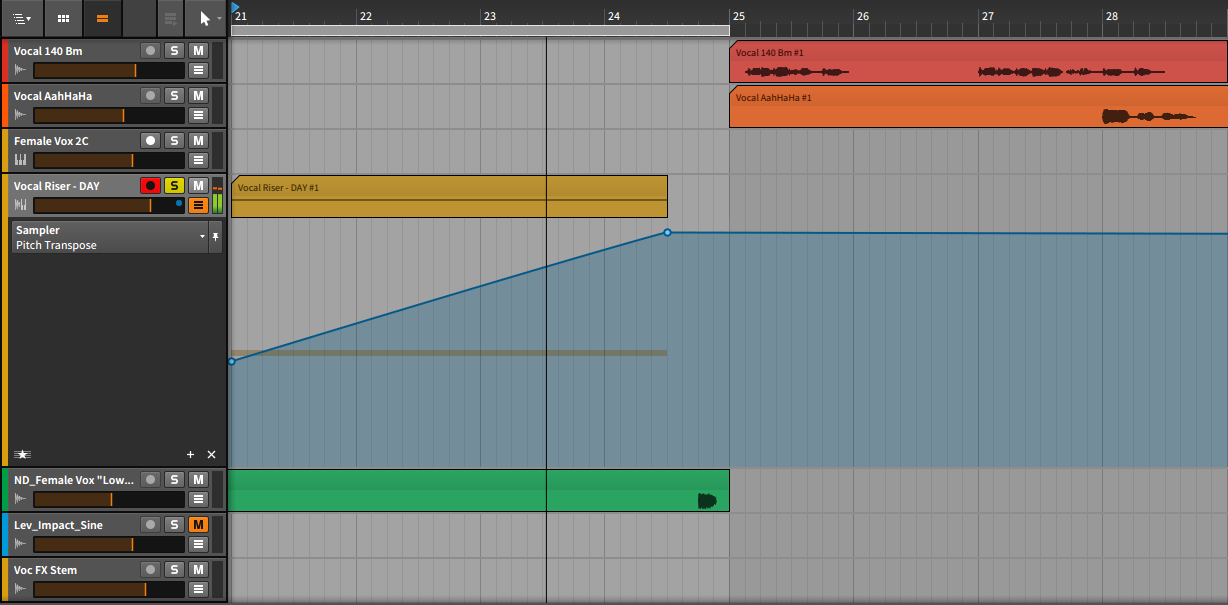
Record a short word or phrase for your vocal riser
In the following example, I’ve recorded the word “day” as an audio clip.
We put the audio clip in a sampler and put the sampler into “forward loop mode”. Importantly adjust the looping so it’s smooth in the crossing-point and does not introduce too many artificial clicks.
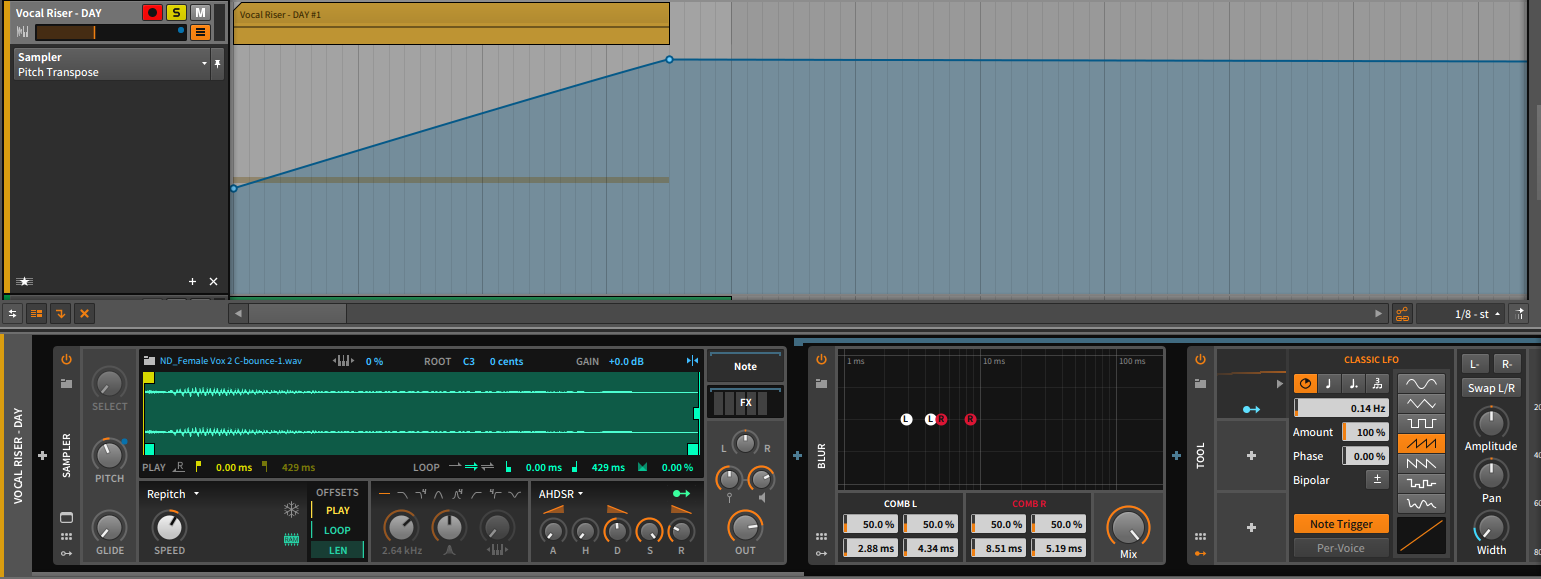
Listen to the short sample of the Vocal Riser:
It does not matter if this word is in key with your song since the pitch will be rising continuously, and ever so slightly. Just record a fun word or phrase, or grab a sample from your favourite vocal library.
We add a long note in the midi clip for say 4 bars and add automation for the volume and pitch of the sampler. You might have recorded the word in sync with the project tempo but as soon as the pitch goes up the sample looping will get faster (if you are in a regular sample playback mode).
Be careful with the type of reverb you choose for the transition effect track.
Don’t drench this track in reverb or delay since it takes away the impact and definition of the vocal. Instead, use a very short room reverb (below 0.3s) to place the sound in the depth field of your mix if you want it to sit in the background. Also cut some of the lows below say 120hz in the reverb EQ if you have other instruments going to prevent a muddy mix.
It’s absolutely OK to add an LFO modulating the volume or a filter (hello – LFO Tool) if you want even more movement to the sound.
I recently wrote an article on the excellent delay Colour Copy from u-he which is one of the best delay for vocals I’ve heard.
The finished vocal riser transition effect in a song context.
In the example below I am automating the volume and pitch to rise for 4 bars. The track has an LFO modulating the volume which adds even more choppy movement. We gradually increased the reverb decay towards the very end to make the sound splash out just before the transition point.
Listen to a short sample of the Vocal Riser in context of a Future Bass track:
Boost Your Productions – Pristine Sound Packs
2. Noise Sweep Transition Effect
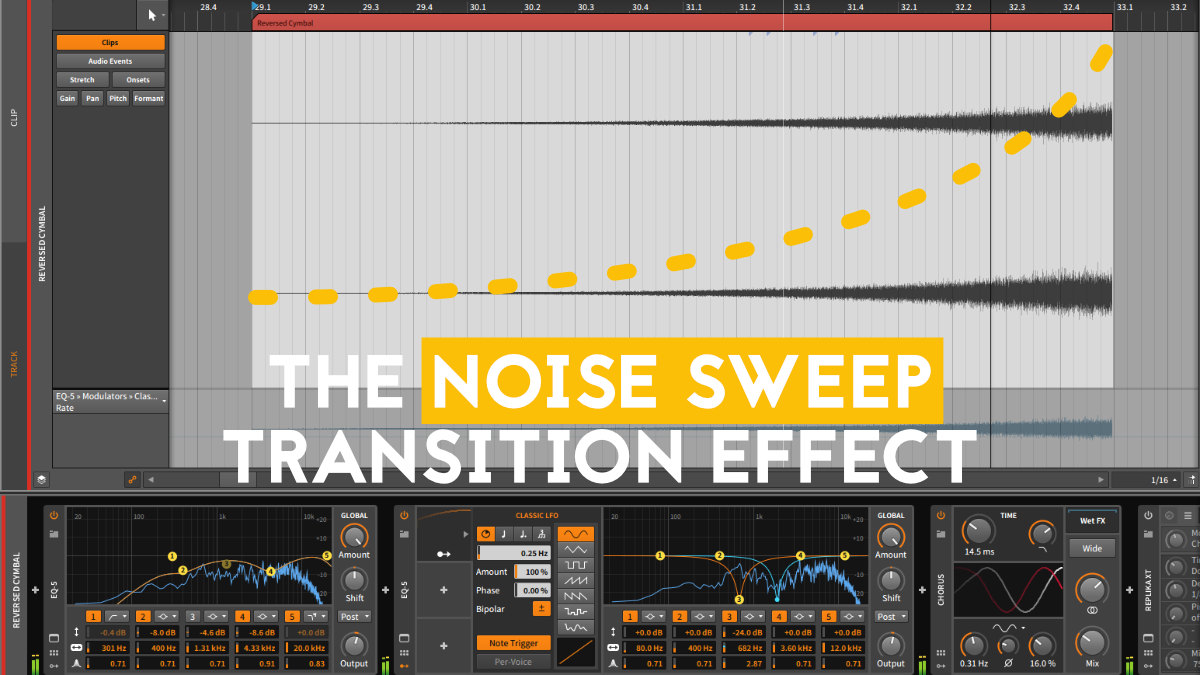
A new section in a song often begins with some kind of impact sound with a sharp transient. The impact emphasises that this is a start of something new. This impact often comes in the form of a sizzling crash cymbal sitting on top of a kick drum. We hit it on the first beat of bar one in a music section. The high pitched ring makes us wake up and feel the fresh start of something new.
Listen to the reversed cymbal sweep with some chorus and EQ modulation:
The reversed cymbal in a song context with panning modulation.
Different songs require different impacts.
Be sure to try different impact samples from your library to see what kind of cymbal or hit that fits your song and genre. In an EDM-track you might want a really defined crash cymbal that cuts through the other sounds. While in a delicate ballad you might go for a chill sweeping wind-chime.
In an epic, orchestral song you will probably want to use one of those big Asian gongs to give the piece a bombastic epic flavour.
The sweeping cymbal might seem “old and overly used” so if you feel you want something fresh, try a different kind of metallic or found sounds sample. I created a Found Sounds Pack #1 with some unique samples you can use as a foundation for interesting transition sounds.
You will be surprised how well some metallic objects tumbling around in a box will sound with a good reverb, and in reverse playback. Don’t be shy, try it out!
Listen to a sample of a found sound riser transition effect:
You can also spread out some sparkle in your track and use a reversed sound leading into your snare or kick like in this example:
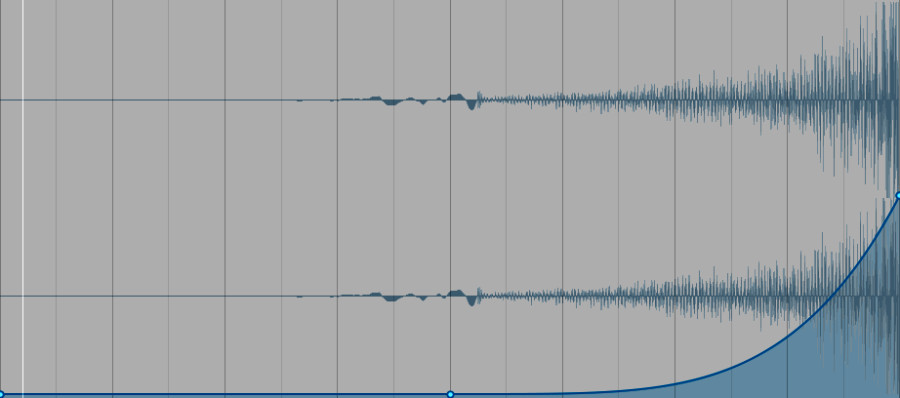
The traditional sweeping noise effect.
If you want a more traditional sweeping noise effect you can bring your favourite synth to the table. Most synths have a noise generator so let it shine with white noise (pink noise works too). You can use the amplitude envelope in the synth to get the gradual volume increase, but that is a bit harder to control and sync with the transition. Therefore we use the track automation lane to draw a gradual increase in volume over time.
Splash the transition sound with reverb and delay before reversing it.
Add tons of reverb and delay to the sample and bounce the audio. Reverse the bounced audio and you have a new transition sound to use in your songs.
Draw some volume automation in the track lane to give the sound a gradually increase in gain up to the transition point.
Furthermore, it can also be effective to add a filter with a beat-synced LFO to give the sweep even more movement. Chrous, flangers and modulation effects in general sound very good in transition sounds. Experimentation is always key to achieve interesting new transition sounds.
Listen to a sample of a traditional noise riser sound with some chorus and modulation:
3. The Downer / Pitch Drop Transition Effect
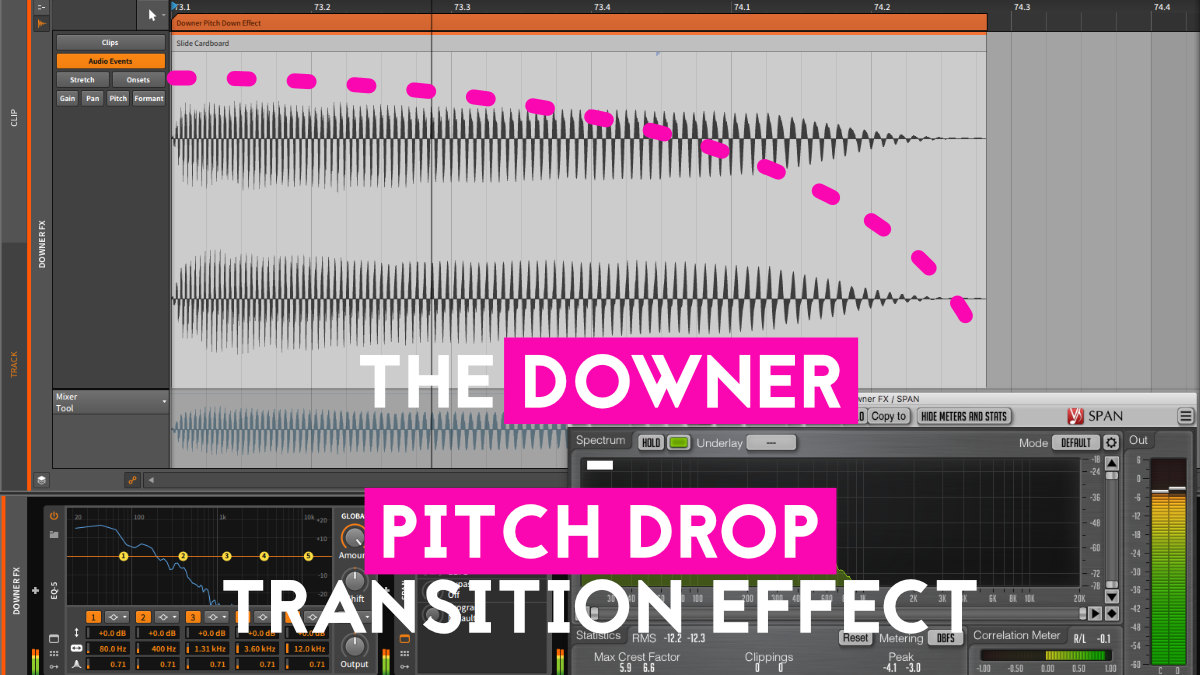
The downer or pitch drop transition sound is effectively used in the first beat, of the first bar, in your breakdown section. This sound effect brings down the dynamics of your track. Downer effects are great when you are going from a chorus drop into a more gentle breakdown or bridge section.
If you want your song to sound alive you probably already know that you should have dynamics in your track. Make your chorus big and juicy! Let a balanced portion of your track breathe with fewer sounds.
I think the most common downer effect is the sine wave with a falling pitch. You can effectively add some tube distortion to bring a few more harmonics into the sine wave to give it a little bit more body.
Your listener might playback your track on Spotify via small phone speakers. Therefore make sure that all your important sounds have body, mids and high-frequency content to come through on the devices.
Listen to a sample of a downer transition effect right at the beginning of the breakdown to help bring down the dynamics of our track:
The isolated downer transition sound effect:
4. Snare Rolls and Fills
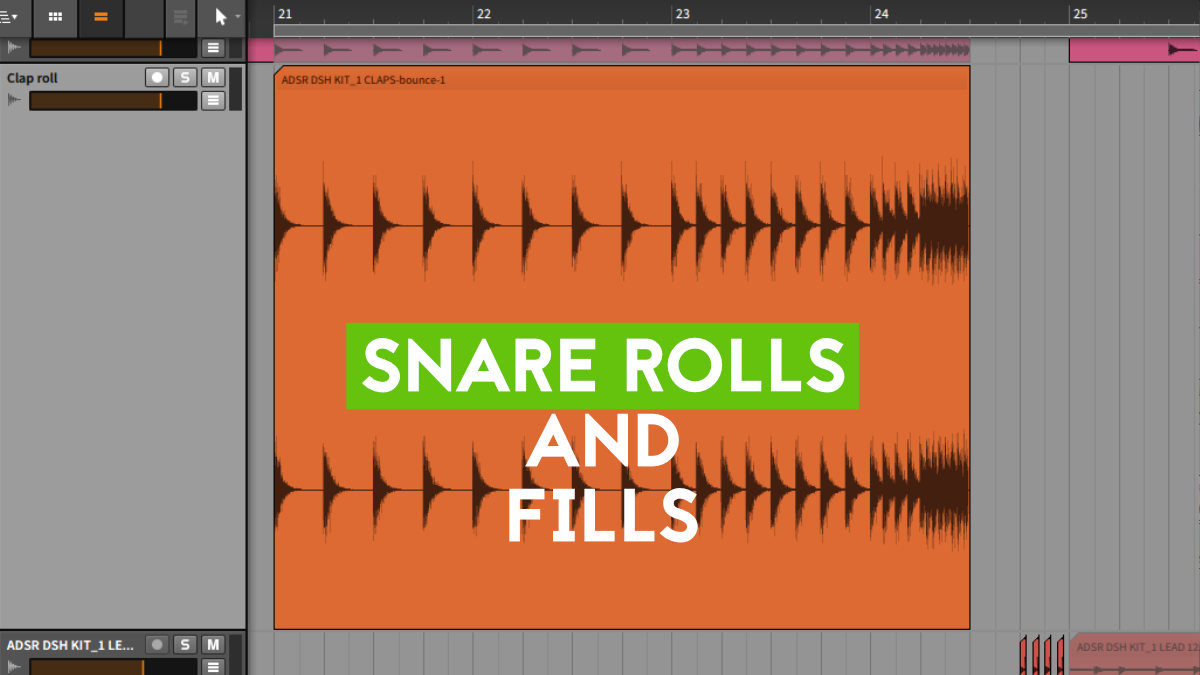
Snare rolls leading into a chorus is another effective way to build anticipation towards the climax of your song. Begin with some quarter note snares in the first bar. Switch to 8th notes in the second bar. Thereafter you go full throttle with 16th notes for the final bar before the chorus section.
Try variations with triplets and other rhythmic formulas to give your track some spice. Replace the snare with a tiny clap and see how that sounds in your track.
If you are producing Trap, Future Bass etc. you are probably familiar with 16th snare repetitions with pitch modulation. Be creative, don’t let the norm stop you from going overboard and try new things!
Listen to a clap roll leading into the chorus drop:
5. Selective Muting In Transitions
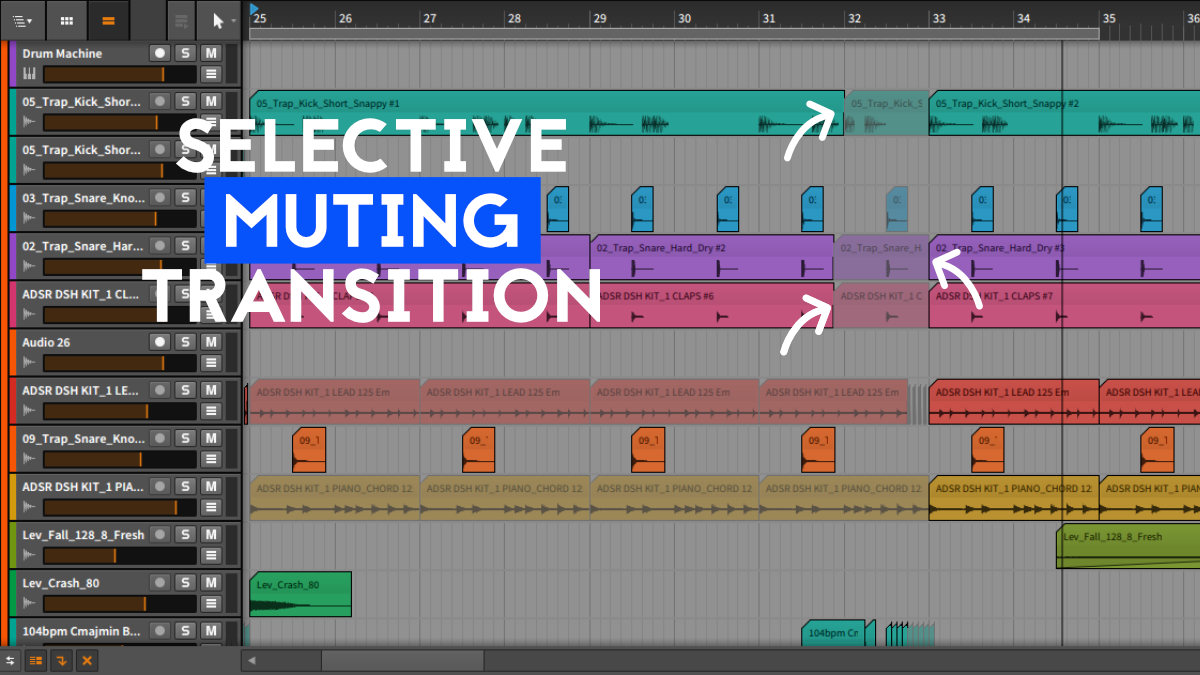
How about muting some audio clips or midi events right before a new section begins. This is very effective and in pop music, you could typically hear this
In modern EDM you can hear this all over the place where we take out clips right before a section change. Maybe mute a few kick hits and snares to let the listener feel the excitement of something happening in the track.
Use sparingly and your track will fell more alive!
Listen closely to this music snippet where I take out some of the percussive elements right at the end of a section:
So there you have my favourite Transition Techniques in Music Production. They are all over the place in my productions.
I have a new article out where I talk about how to find your own artistic voice.
I hope you found this article useful in your own music adventures.
If you have any questions, feel free to contact me via the contact page.
AUTHOR – Mattias Holmgren / Creative Director
@ Morningdew Media
What gear I use in the studio? Check out the Resources Page.
Join my exclusive community: https://www.patreon.com/gelhein
Be sure to sign up to our newsletter for new exciting articles in design, music production and sound design.

