Programming drums is a major part in all kinds of modern music production. You need a solid foundation for your track to rest and build upon. So, how do producers make drum kits? In this article we will discuss the various parts of a drum kit.
When we are done you will be able to build your very own first drum kit and program some groovy beats. So let’s talk drum production!
The two most important parts that make up your drum kit is the kick, and the snare. We will begin with the kick since it is the heartbeat of a song. This is the first sound I think about when creating a new track. If you pick (or create) a good kick from the start you have a very good starting point and reference for the rest of your drum kit. Building a good sounding kit is about finding balance.
How do producers make drum kits?
Think about what kind of track you want to create. What kind of mood do you want to express with the music? Is this a heavy EDM banger track (read Dubstep), a soft soaring ballad, a euphoric EDM track (read Trance) or a laidback jazz track?
Importantly, if you want to set out and finish a track without spending days finding the correct sounds and vibe, it’s a very good idea to define and set the genre right at the very start. Take it one step at a time and you will be up and running with awesome grooves in no-time.
Why a producer selects the mood and genre carefully before production start.
It’s very easy just to dive in and start experimenting with several parts of a song like drums, melody and harmony at the same time. But this is not necessarily very good practise. You are ultimately splitting your focus. Especially if you are not a seasoned producer with many tracks behind your back.
This is why we choose to begin by building our drum kit at the very start. Here we focus solely on the percussive side, the rhythm, the riddim… And we begin by finding a good solid kick for the foundation.
Kick – Finding a solid kick for your drum kit.
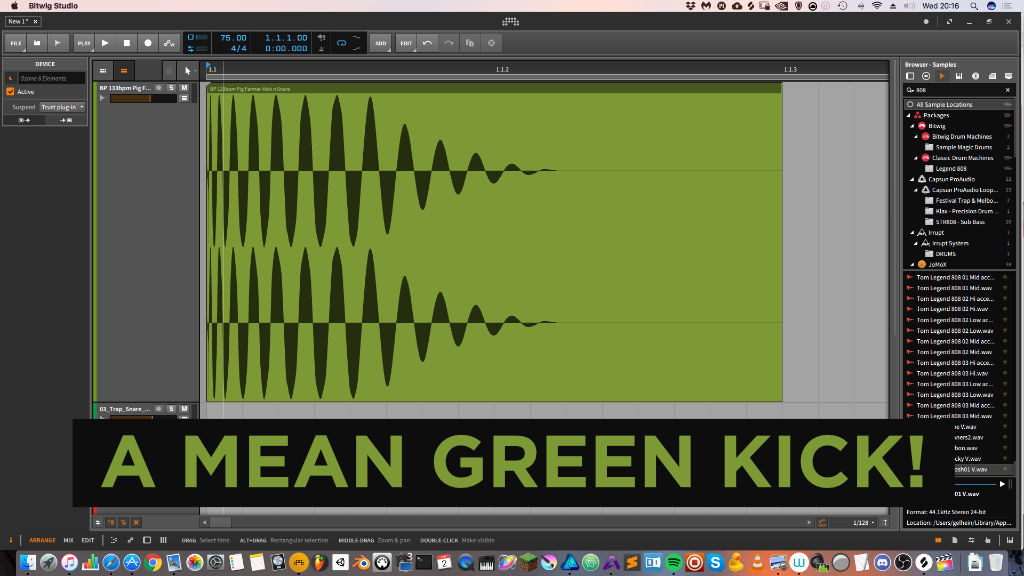
The kick is the heartbeat of your track and needs close attention since it’s the pulse which will drive the track. Selecting a kick can be cumbersome if your ears are new to a genre but if you have selected a good reference track this will ease the process tremendously.
Setup some A / B listening in your DAW, this can be done in many ways. Or you can just have a folder open (or iTunes) with the reference song with that booming deep thuddy kick you want to imitate.
A good way to see that the kick fits your genre is to program a beat and switch kicks while the pattern is running. Program a quick looping pattern with some kicks beating similar to your reference track. This does not have to be too extensive and long, 4 or 8 bars i enough. Let the pattern run and swap out the kick until you find the right one for your track. You will instantly hear when it’s getting close to the reference kick.
What defines a good kick in a drum kit?
A good kick will sound punchy and often be the loudest sound in your mix so it’s important to find the right kick sound for your track. If a sound is loud and upfront it’s very important that it “rocks your audience” and has a good sound.
Furthermore, the kick might be the deepest sound in your production, or the bass, depending on your genre and style. This means that the kicks first harmonic resides somewhere around 50hz. A kick is often created by a quick pitch envelope from high-pitch to the low-pitch which will give the sound a bit of high-end as well as the deep bass sound.
Firstly, let’s take a quick look at the different important frequencies of a kick sample.
There is of course information further up in the frequency range in the kick too, but we are focusing on the low end thump.
How do producers make drum kits?Important frequencies in a kick.
20 – 60 Hz – Sub Bass.
Boost in this range to add low-end punch. This frequency is really felt in your stomach. Be sure to have good studio monitors and a good room to mix in to adjust this frequency area properly.
60hz – 250 hz – Bass.
If you have a weak kick in the bass, you can experiment with adding a few db in the 80-100hz area. The bass area can also be divided further from 150hz to 250 hz if you need to dissect your sound further and make more refined adjustments.
In the 150-250 hz area you can probably cut a few db (decibels) to reduce potential boominess in the kick while allowing the lower bass frequencies to come through. Cutting here gives thickness to the low-end without adding muddiness to the overall sound.
300 – 600 Hz – Low Midrange.
The area where you find the annoying cardboard sound on bad samples. If your kick drum sounds boxy, try with a drastic cut in this area (6 – 8db). Some drum microphones even come with a pre-set EQ curve that scoops out the mids to reduce boxiness and to help the kick sit properly.
2 – 4 kHz – Midrange.
This is where the snap and crack of a sound resides. If you have a hard time getting the kick drum to cut through the mix, don’t increase low-end content, instead add to the mids. A broad boost in this section can bring out the beater sound (if you are working with an acoustic kick sample). In pop you often boost with a broad band EQ at 2 kHz. Furthermore, a narrower boost at 4-8 kHz will bring out the click you hear so prominently in metal music.
10+ kHz – High End.
This area can be left untouched (or filtered out completely) depending on the genre you are working with. You can try to boost this range, if your song has a very minimal instrumental setup. Try to add a bit of “air” to your kick sound by boosting slightly and find out if your kick has content up in the 8-10khz area. Importantly, always remember to leave room.
Glitch Hop Kick for snappy drum kits.
If we were going to create a semi-aggressive glitch hop kit with a bit of retro-ish vibe to it we would select a kick with a snappy attack and heavy body.
On the other hand, if we are going to create a trap / hip hop beat we would rather select a more light thuddy kick with a light body. A kick without too much low end, since we would probably going to add an 808 bass to the track which will really fill in that low end.
Great starter drum kit for producers

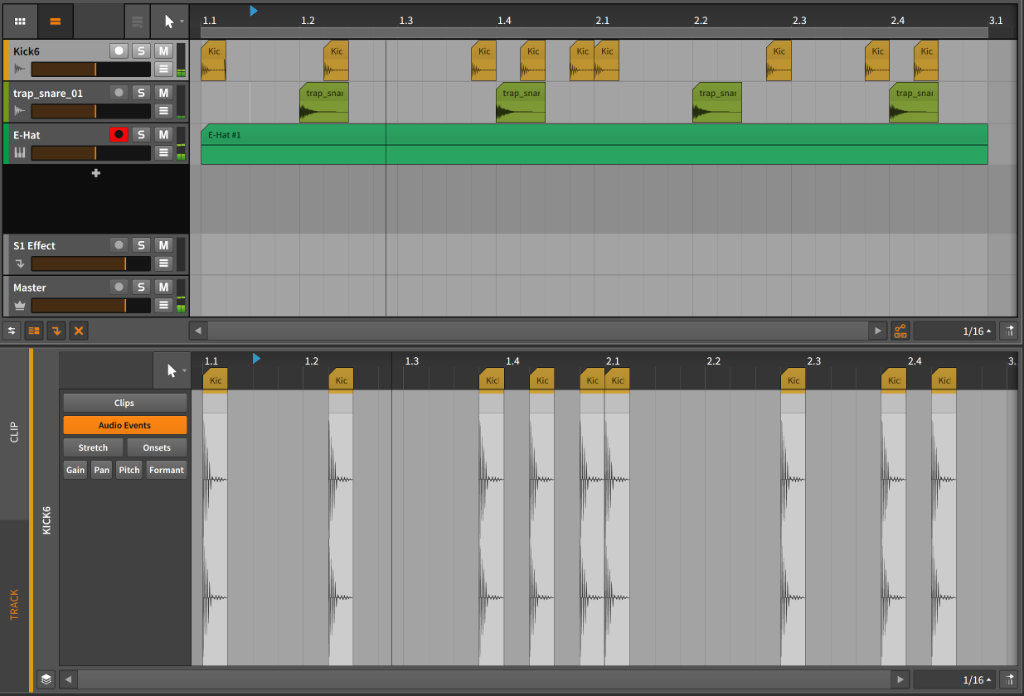
Trap Kick
Snare – Selecting a snare to fit your kick sample.
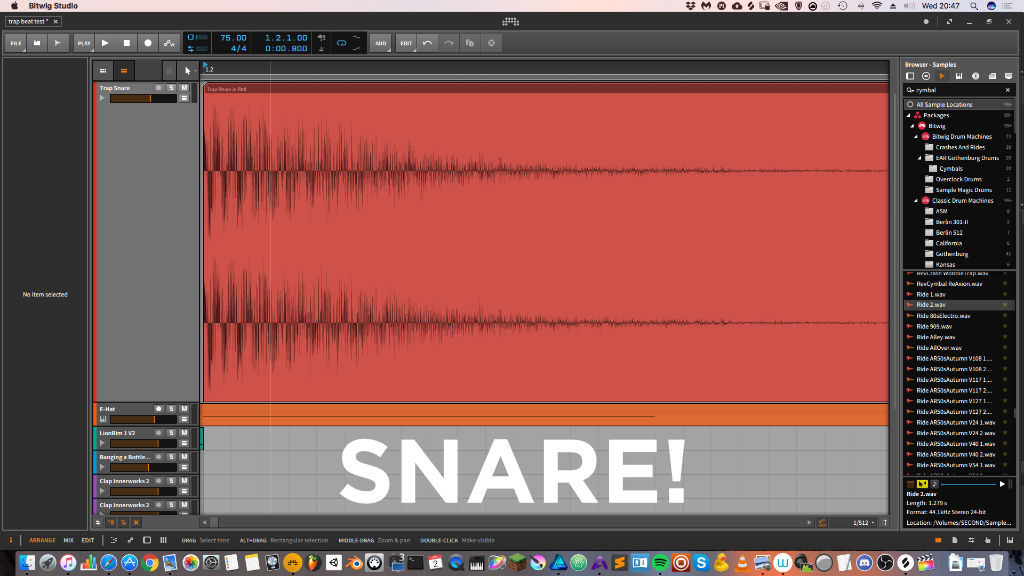
Now when we know what our kick sounds like we can begin the search for a snare to fit in the pocket where the kick does not hit. Well if you are programming a four on the floor kick you will probably have the snare on the 2 and 4, but you know what I mean.
Firstly, a snare usually has it’s fundamental (fundamental frequency) at around 150hz – 300hz.
This is the key frequency you are looking for when selecting a snare for your specific genre. Find out the fundamental of the reference snare (or what’s typical for your genre) and go look for a snare that has a strong hit in that frequency. You can also pitch snares up or down to make them sit in that range. Genres like Future Bass tend to have higher pitched snares.
Should I use a snare sample from a pack, or create my own sound from scratch?
Your DAW probably comes with a range of good snares ready to be used, Though genres and sound evolve quickly these days, and more often those DAW sounds might be a bit dated. So my suggestion is to find samples from recently released sample packs from dedicated and professional sound designers.
Find a pack with a focus on the genre you are working with.
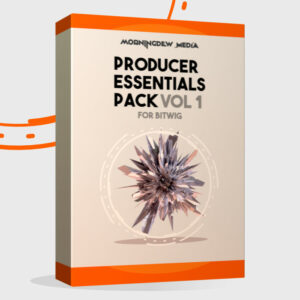
I find it’s a lot harder to pick a good snare than finding a good kick to work with. If you buy some recently released sample packs, like the Producer Essentials Pack Vol 1 for Bitwig you instantly have access to some good and ready to go snares.
Creating your own snare for a custom drum kit.
If you are at medium level in music production I would suggest you start experimenting with creating your own snares. Creating your own sounds will help build your identity and brand as an artist. Furthermore, you can really come up with exotic snares by layering different snare samples (and foley sounds) on top to create new smacks (read snares).
Be sure to use EQ on each snare layer to remove unnecessary frequencies in the sound. This will probably mean some cuts in the low and top end. And maybe some cuts of a few db in the 350-500 hz range. The low mids is usually a problematic spectrum to mix so be extra careful with that.
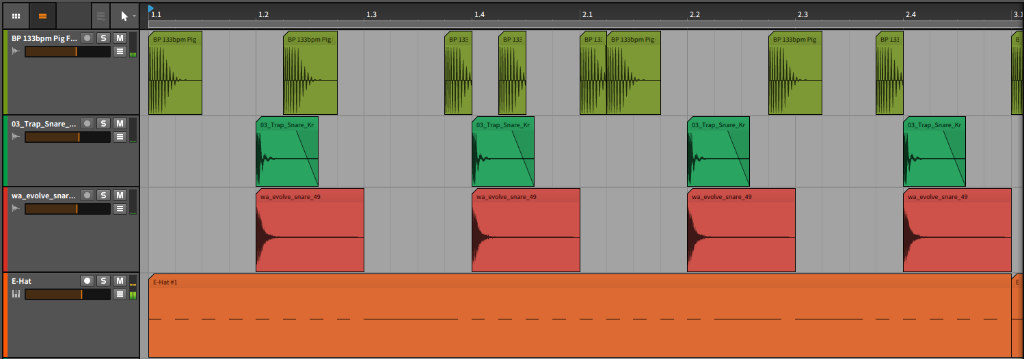
Now, program some snare hits into the pattern you created above.
Producers layer snares for a fatter sound in their drum kits.
If you find it hard to select a snare to the kick, just play your reference track and A/B with the snares you have at your disposal. If you need more “air” in the snare, try to add a subtle layer of noise on top. Or try a reverberated foley sample. Anything goes as long as it works!
This is what I came up with while selecting the snare for my track.
Kick & snare drum kit pattern.
Great, now the foundation for our drum kit is defined and we can continue and select some more exotic percussive sounds to fill out and sparkle our beats. There are many tracks that just use a kick, or a kick and a snare and are totally fine with that. Be sure to have a lot of high frequency content on your kicks and snares if this is the case.
But we like to add spice and sparkle don’t we? So let’s add some hi-hats and cymbals.
Hi-Hat – The sizzling top layer of your producer drum kit.
In the previous chapters we selected a kick and a snare. This gave us the low-end and mid-meat in the frequency spectrum of our drum sounds. But to wrap it up and close the circle we need to add the icing on the cake, some hi-hat sizzle. This will add the final touch and sprakle to the drums.
Again, listen to your reference track and listen to what kind of sizzle in the top end you hear. A hi-hat isn’t too hard to select if you already made the kick and snare. The top frequency content of your drums can be anything from noise generated hi-hats, to short foley sounds.
I selected a sharp hi-hat typical in trap music. I made it play 8th notes and also sprinkle some 16th notes on a few places to make some variation. This is typical in trap beats.
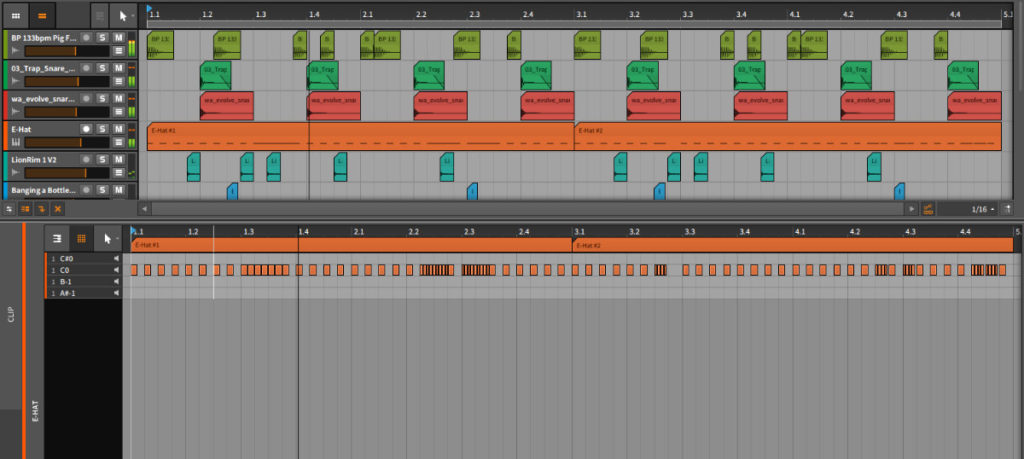
Drum pattern with hi-hat included.
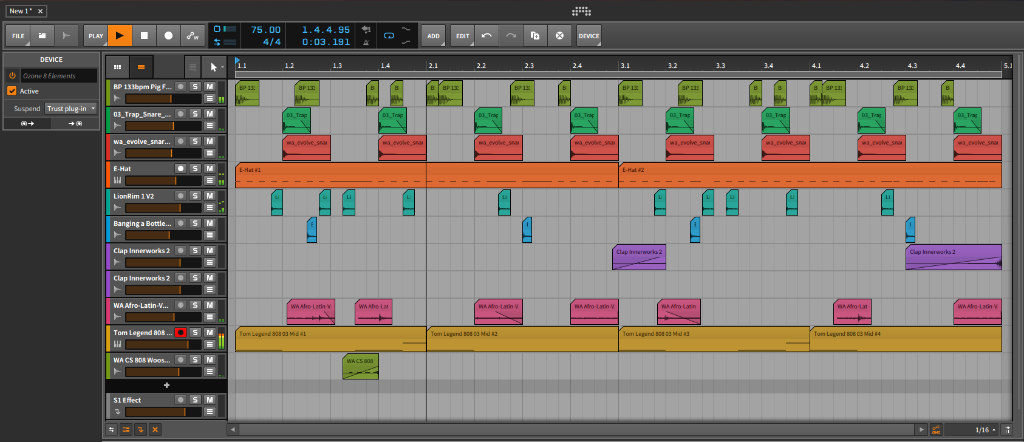
Furthermore, we can also make this pattern even more interesting. It feels a bit dull and stale. It does miss some soul to make it come alive and make us dance. How about adding some additional percussion or foley sounds into the drum pattern?
I watch for empty spots in the pattern where the kick and snare is not hitting and carefully place some foley sounds into those empty places. Experimentation is key here so be sure to walk through a few sounds before you make the decision to stick with a sound.
Trap pattern with additional foley percussion added to the drum kit.
How do producers make drum kits – Conclusion
With this article I hope you grasp how producers make drum kits. It takes some time and practise to master different drum styles, but begin with some basic patterns and imitate your favourite producers. You will be a rock star beat programmer in no-time.
If you are just starting out as a producer it might be good practise to use pre-existing samples. And select the best possible quality samples you can get your hands on. It will really save you time because there is nothing more frustration trying to get a dull (bad) sample to sound decent. Just give yourself an early / late Christmas present and you should be able to create awesome beats in a few days.
You can grab some great samples in my webshop here.
When you have been creating beats for a while, be sure to explore your own ideas in sound design and start to create kicks, snares and all the other sounds for your kits. It will give your tracks an identity and help you build a brand of your own. These are exciting times and there are million ways to create unique sounds with the tools available.
I hope you found this article useful for your beat creations.
Making Beats like a Bitwig Pro Producer featuring Maschine Jam
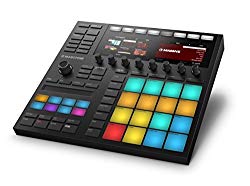
A great tool to sequencing drums and give your drums life with dynamic automation is the Maschine Jam from Native Instruments. I wrote an article on using Maschine Jam with Bitwig Studio here.
Furthermore, you can watch a video tutorial on how to program drums in Bitwig for various styles like Hip-hop, Trap, Glitch Hop and DnB.
What gear I use in the studio? Check out the Resources Page.
Join my exclusive community: https://www.patreon.com/gelhein
Be sure to sign up to our newsletter for new exciting articles in design, music production and sound design.
